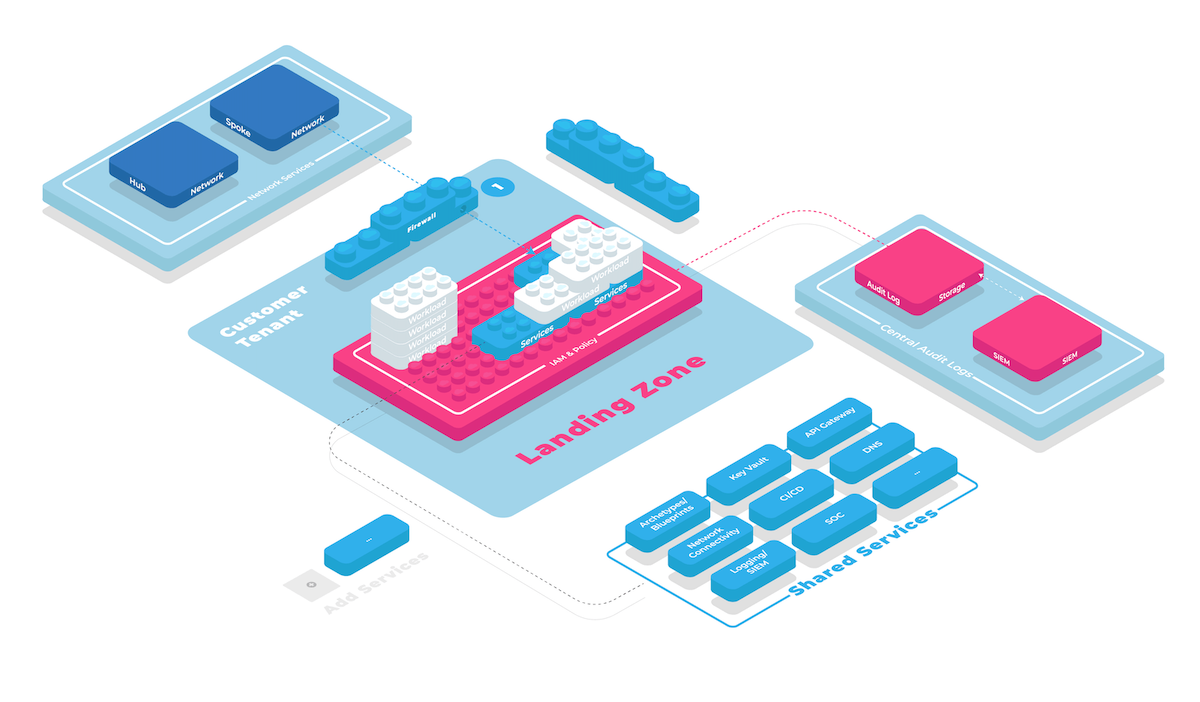
Start your Cloud Foundation
This series of tutorials will lead you through the steps to get started with collie. This first tutorial will show you how to
- initialize a new repository to work with collie
- add your first cloud platform
- import a reusable kit module from collie hub
- create and review documentation for your cloud foundation
Throughout our tutorials, we are goin to use "Likvid Bank" as the name of a fictional organization that we are building a cloud foundation for.
Verify Collie Installation
Let's first review whether we have collie and the dependencies on other tools that we are going to need correctly installed.
$ collie info
collie v0.17.0

Runtime:
deno 1.34.2 x86_64-apple-darwin

Installed dependencies:
aws 2.12.6
az 2.49.0
gcloud 433.0.1
git 2.38.1
terraform v1.5.2
terragrunt v0.48.0
terraform-docs v0.16.0
npm 9.5.1
2
3
4
5
6
7
8
9
10
11
12
13
14
15
The other tools are however required to use all of collie's capabilities. If one of the tools lists as not installed or unsupported version, please review the installation instructions to fix this.
When all tools are correctly installed and detected by collie, we can continue with the next step.
Initialize Collie Repository
Collie manages all of your cloud platforms and landing zone configurations in a git repository called a collie repository.
Let's create this repository using the following command.
# Initialize a collie git repository
collie init likvid-foundation

# Change into the directory
cd likvid-foundation
2
3
4
5
Create a Foundation
TIP
Depending on the cloud platforms you plan on working with, you may not need all of aws, az and gcloud installed.
After running this command, let's create a new cloud foundation. We will call this likvid-prod.
Let's run collie foundation new likvid-prod to start an interactive configuration for this foundation.
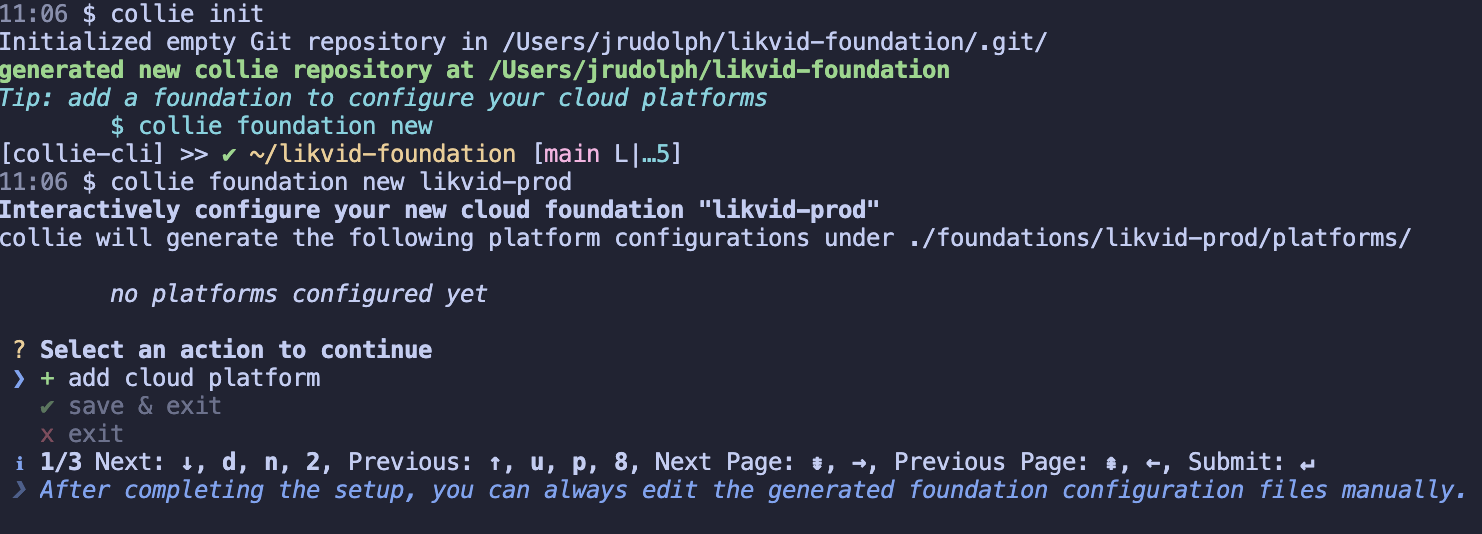
Add a platform
Follow the interactive prompt + add cloud platform and select the type of cloud platform you want to add (AWS, Azure or GCP). Then follow the instructions to complete the configuration.
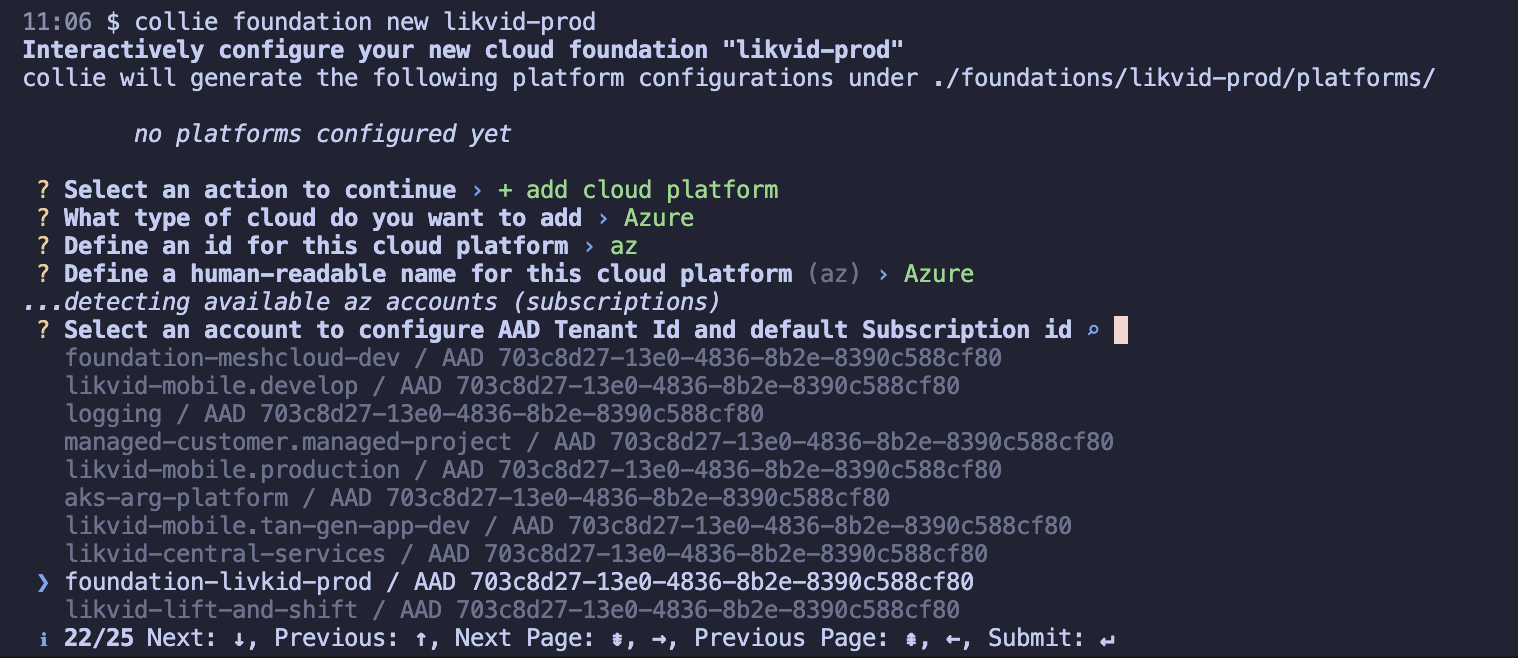
After completing the prompts, chose ✔ save & exit to persist this configuration in your collie repository.
Review Collie Repository
After completing these steps, let's now review the structure of our collie repository:
$ tree
.
├── README.md
├── compliance
├── foundations
│   └── likvid-prod
│       ├── README.md
│       └── platforms
│           └── az
│               └── README.md
└── kit
    └── README.md

6 directories, 4 files
2
3
4
5
6
7
8
9
10
11
12
13
14
As you can see our platform has a 1:1 representation in the filesystem under foundations/likvid-prod/platforms/az/README.md. These files are collie configuration objects and they're the approach how collie stores all of its data about your cloud foundation.
Generate Documentation
When you develop a cloud foundation and start delivering landing zones to application teams in your organization, it's important that you are able to clearly articulate how the landing zones are designed and built.
For this purpose, collie includes features to generate and automatically maintain documentation from the landing zones defined in your collie repository.
TIP
Since this documentation includes everything that is in your repository, it's also a great way of reviewing your progress as you are building up landing zones for your organization.
Import Documentation Template
We will start our documentation by importing a template.
collie kit import foundation/docs
Next let's generate the docs and open a local webserver to preview them
collie foundation docs --preview
Next Steps
In the next tutorial, we are going to learn how to deploy our first kit module to our cloud platform.
TIP
Now is a good time to commit your changes to git.
git add . && git commit -m "initialized likvid-prod"